Tuesday, 16 July 2013

Haranguing indeed.

Last Saturday I began 'eating the frog' that is connecting-up my wiring.  It's a fillip that a couple of minor changes can start to make it all look more manageable.
I need to add some electronic components to sort-out the last remaining live feeds to the loom.  The first is standard motorsport-fare - a ballast resistor in the coil feed that stops the motor from running-on when the master switch is turned off.  The second is more of an experiment in that in junking the bike's rather confusing relay assembly I've also stripped-out a zener diode assembly that presumably acts to protect certain components when the engine is cranked.  Having got some advice, I've basically ended-up with this:
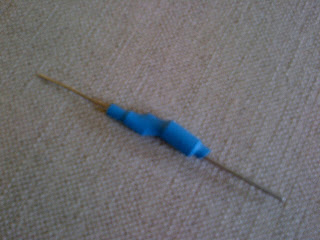
This is simply 1N5408 rectifier diode and a 18-24V zener diode with a 3W rating soldered together.  Will it work?  There's only one way to find out.  In other news, one of the back-stays was checked for length and tig welded up.
I've also bolted the original horn from the bike to the chassis; this is one of the 'road-going' elements that puts the R into RGB.  It's also necessary if I choose to IVA the Gemini so either way I need it.  Finally, I collected the powder-coated wishbones and Panhard rod so those are now ready to fit, hopefully on Saturday.  
If I can gather enough bodies to help lift the car from the trolley, it could roll.  

TC

Wednesday, 10 July 2013

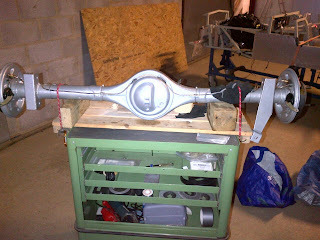
Arse backwards.

This was actually finished (the axle is in) before the cage went in and I forgot to post the photo:

TC

Sunday, 7 July 2013

Roll up, roll up.

Yesterday was a pretty good day.  Reflecting back, I did very little: fitted the fuel pump; built up the front suspension to check the top wishbone length; reamed all the suspension pick-ups to remove the powdercoat; drilled a hole for the side-intrusion bar.

Thankfully Dave was on-site an he achieved a lot more:  machined stainless inserts for the front suspension; completed stainless spacers for the dampers (top and bottom); fitted dampers; completed welding on front wishbones (once they'd been checked to give correct camber); notched front roll hoop and tacked in place; notched 'roof bars' and tacked in place.
So, that's a good day all-told.  I've now got the remaining suspension parts to deliver for powdercoating (wishbones x 6 [two spares] and the panhard rod.)  I'm then going to get a local fabricator/welder to finish welding the roll cage so Dave can concentrate on some other stuff, namely the side intrusion bars and the ARBs.  

I therefore really need to crack-on with the wiring - how many times have I now said that?

TC 

Monday, 1 July 2013

Can't sleep, so a quick post on choices.

I've had a couple of small choices to make since the last post.  One involved a change of plans in terms of the fuel pump; there just isn't enough room to use the preferred Facet Gold Flo Silver Top Competition filter - it's about as big as its name.  As a result, I've had to invest in a smaller solid state Facet.  Their reputation isn't quite as good as for the bigger units but, practically, I have little choice.  I'm sure it'll work a treat - it's only a lift pump after all.
As you can see, the Gold Flo is back in it's box.  Open to offers...

The other choice that I needed to make was to decide which centre bearing spacer to use.  I had three of these water-cut (£15 the lot!) in three different thicknesses - 5mm, 6mm and 8mm.
The 8mm was obviously going to be too thick once I eyed-it-up.  The 5mm plate gave the straightest prop run possible but does result in the UJ running a little too close to the chassis.  Hence, the 6mm plate got the nod.  

And now to try again - to bed!

TC

Saturday, 15 June 2013

Axle Fuel-ey

For the second time this year I made a late call not to travel to watch the RGB racing and instead headed for the workshop.  It may not be Beverley Hills (tenuous, I know) but it's better than working on the patio.

The first job was to finish the low pressure hard-pipe fuel lines.  I'd originally planned to use smart Christmas Tree-style fittings at both ends but this wasn't practical at the rear due to limited space.  The front end has worked well though.
One of these will supply fuel to the swirl pot and one will act as the over-flow taking fuel back to the main tank. Although this is only the low pressure part of the fuel system, I'm not happy having the flexible lines connected without some sort of barb or bead. After some research, I decided that Yorkshire-type fittings may provide the solution. These are pipe fittings that already have the necessary solder attached; pretty clever. They, not surprisingly, don't seem to make them to use as beads on kit cars so I had to improvise.  I therefore purchased a straight joining fitting and cut it in half.  After a bit of filing and sanding I slid them onto the cleaned up ends of the pipes and applied some heat - via a brilliant little torch that I own that was intended for browning crème brulees. I'm very happy with the result.
I'm slightly less happy with the wavy floor/  This was damaged when the spit arrangement that we had the chassis on collapsed at one end.  Once the rear panel goes on it should straighten it out a bit.  The fuel lines were the last thing that I needed to do before something genuinely meaningful happened; the axle is in!
I'd be lying if I said that I wasn't a little alarmed by the proximity of the differential to driver's side of the transmission tunnel but I think it will just be okay.  We'll find out at the first test no doubt.
You may have noticed that in the photograph two-up that there are a couple of odd looking thing at the back of the chassis.  These are the exquisitely machined end-fittings for the roll cage back-stays.  Have you seen something similar before?  If it's good enough for formula rep and 750MC board member Hoverd, it's good enough for me.
This uses a huge 5/8" shank rod end and a 1/2" bolt in double shear.  It's pretty damn strong.  Last job of the day was to fit my Christmas present from Kate - it's a Varley Red Top 25 battery.
That'll be something else to connect the cascade of wires too then.

Next?  Front axle and rolling hopefully.

TC


 .

Thursday, 13 June 2013

Back in the saddle.

Writing the last blog post did serve to make me realise that I really should get on with it.  As a starter-for-ten I set myself a couple of simpler tasks to get things moving again.  First up was to add some heat mat to the passenger footwell.  The reason for this was not because I am concerned about the passenger's feet getting toasted by the exhaust heat.  The battery is to be located just the other side of the panel and hence I felt that I should do something to try to protect it.
The products used to do this came mostly from Car Builder Solutions.  The heat mat seemed to get good reviews and the appropriate adhesive was apparently their proprietary contact adhesive.  The sticky stuff was tested a few weeks ago when Kate stuck together two bits of foam on her way to making a foot stool.  At the time I got her to give the heat mat its base coat as per the instructions.  I should also state that Mrs C put her crafting skills to the use when cutting out the heat mat to the correct shape for me.  When I came to actually glue the matting to the car it was a case of applying the adhesive to both sides with a paintbrush and leaving it to dry for fifteen minutes.  When I returned to the mounting surfaces I was suprised to find that they were barely tacky to the touch; I thought I'd got something else wrong.  Reluctant to admit defeat I paired the matting with the aluminium panel.  It sticks.  It really sticks.  Some clever chemical reaction seemed to be under-way as the matting when quite clammy and cold.  Anyway, it's on and I'm halfway through finishing the edges with aluminium tape.
As you can see, there are four bolts that hold the battery mount in place but I can't think how I can practicably protect these.  The second job was to decide where to locate the master switch via it's rather expensive bracket.  I had to check the height of the bodywork as it is now the highest point on the car but all is well.  The cable run to the side of the car for marshal use is going to be very short and it'll still be okay for me to use - although I will have an ignition switch closer at hand.
 One big project completed (by Dave) is the build-up of the axle.  This was delivered back to me this week and I'll hopefully fit it this weekend - albeit with some old dampers on-loan from local RGBer Al Boulton while I wait for my Protech's to arrive.
The next big project is the roll cage; work is under-way.
So there we are - I'm back up and running.  Deadline? Pah!

TC

Sunday, 9 June 2013

Motivation Narration

There's not much to say really.  I've just lost two weeks due to sheer apathy.  I simply haven't wanted to face the car (if it can really be called that yet.)  Everything seems to take at least twice - often four-times - as long as it should and frankly it doesn't feel like fun at the moment.

This is a bit of a problem as I've got it booked-in at http://www.conceptracing.co.uk/ to have all the tanks and some water pipes made in a fortnight so I need to postpone that.  It needs to be rolling really first and I need to add a bed to the trailer.

Progress has otherwise been limited to fitting the hub bearings and buying a few odds and sods, like this master switch bracket - which I shouldn't have bought as it's really not worth £50.
Even watching the excellent coverage on Motors TV of the RGB racing at Snetterton didn't prompt me to run out to the shed - it just feels so bloody far off still.

TC